Remember to test everything outside of the case first. Use the motherboard box to put the motherboard on and connect everything. Then do a first boot to make sure nothing is broken.
1 Like
Hmm… I’ve never done this with a build before - always built right into the case. Is there a big benefit to testing outside or just the accessibility of popping things in/out as needed for testing?
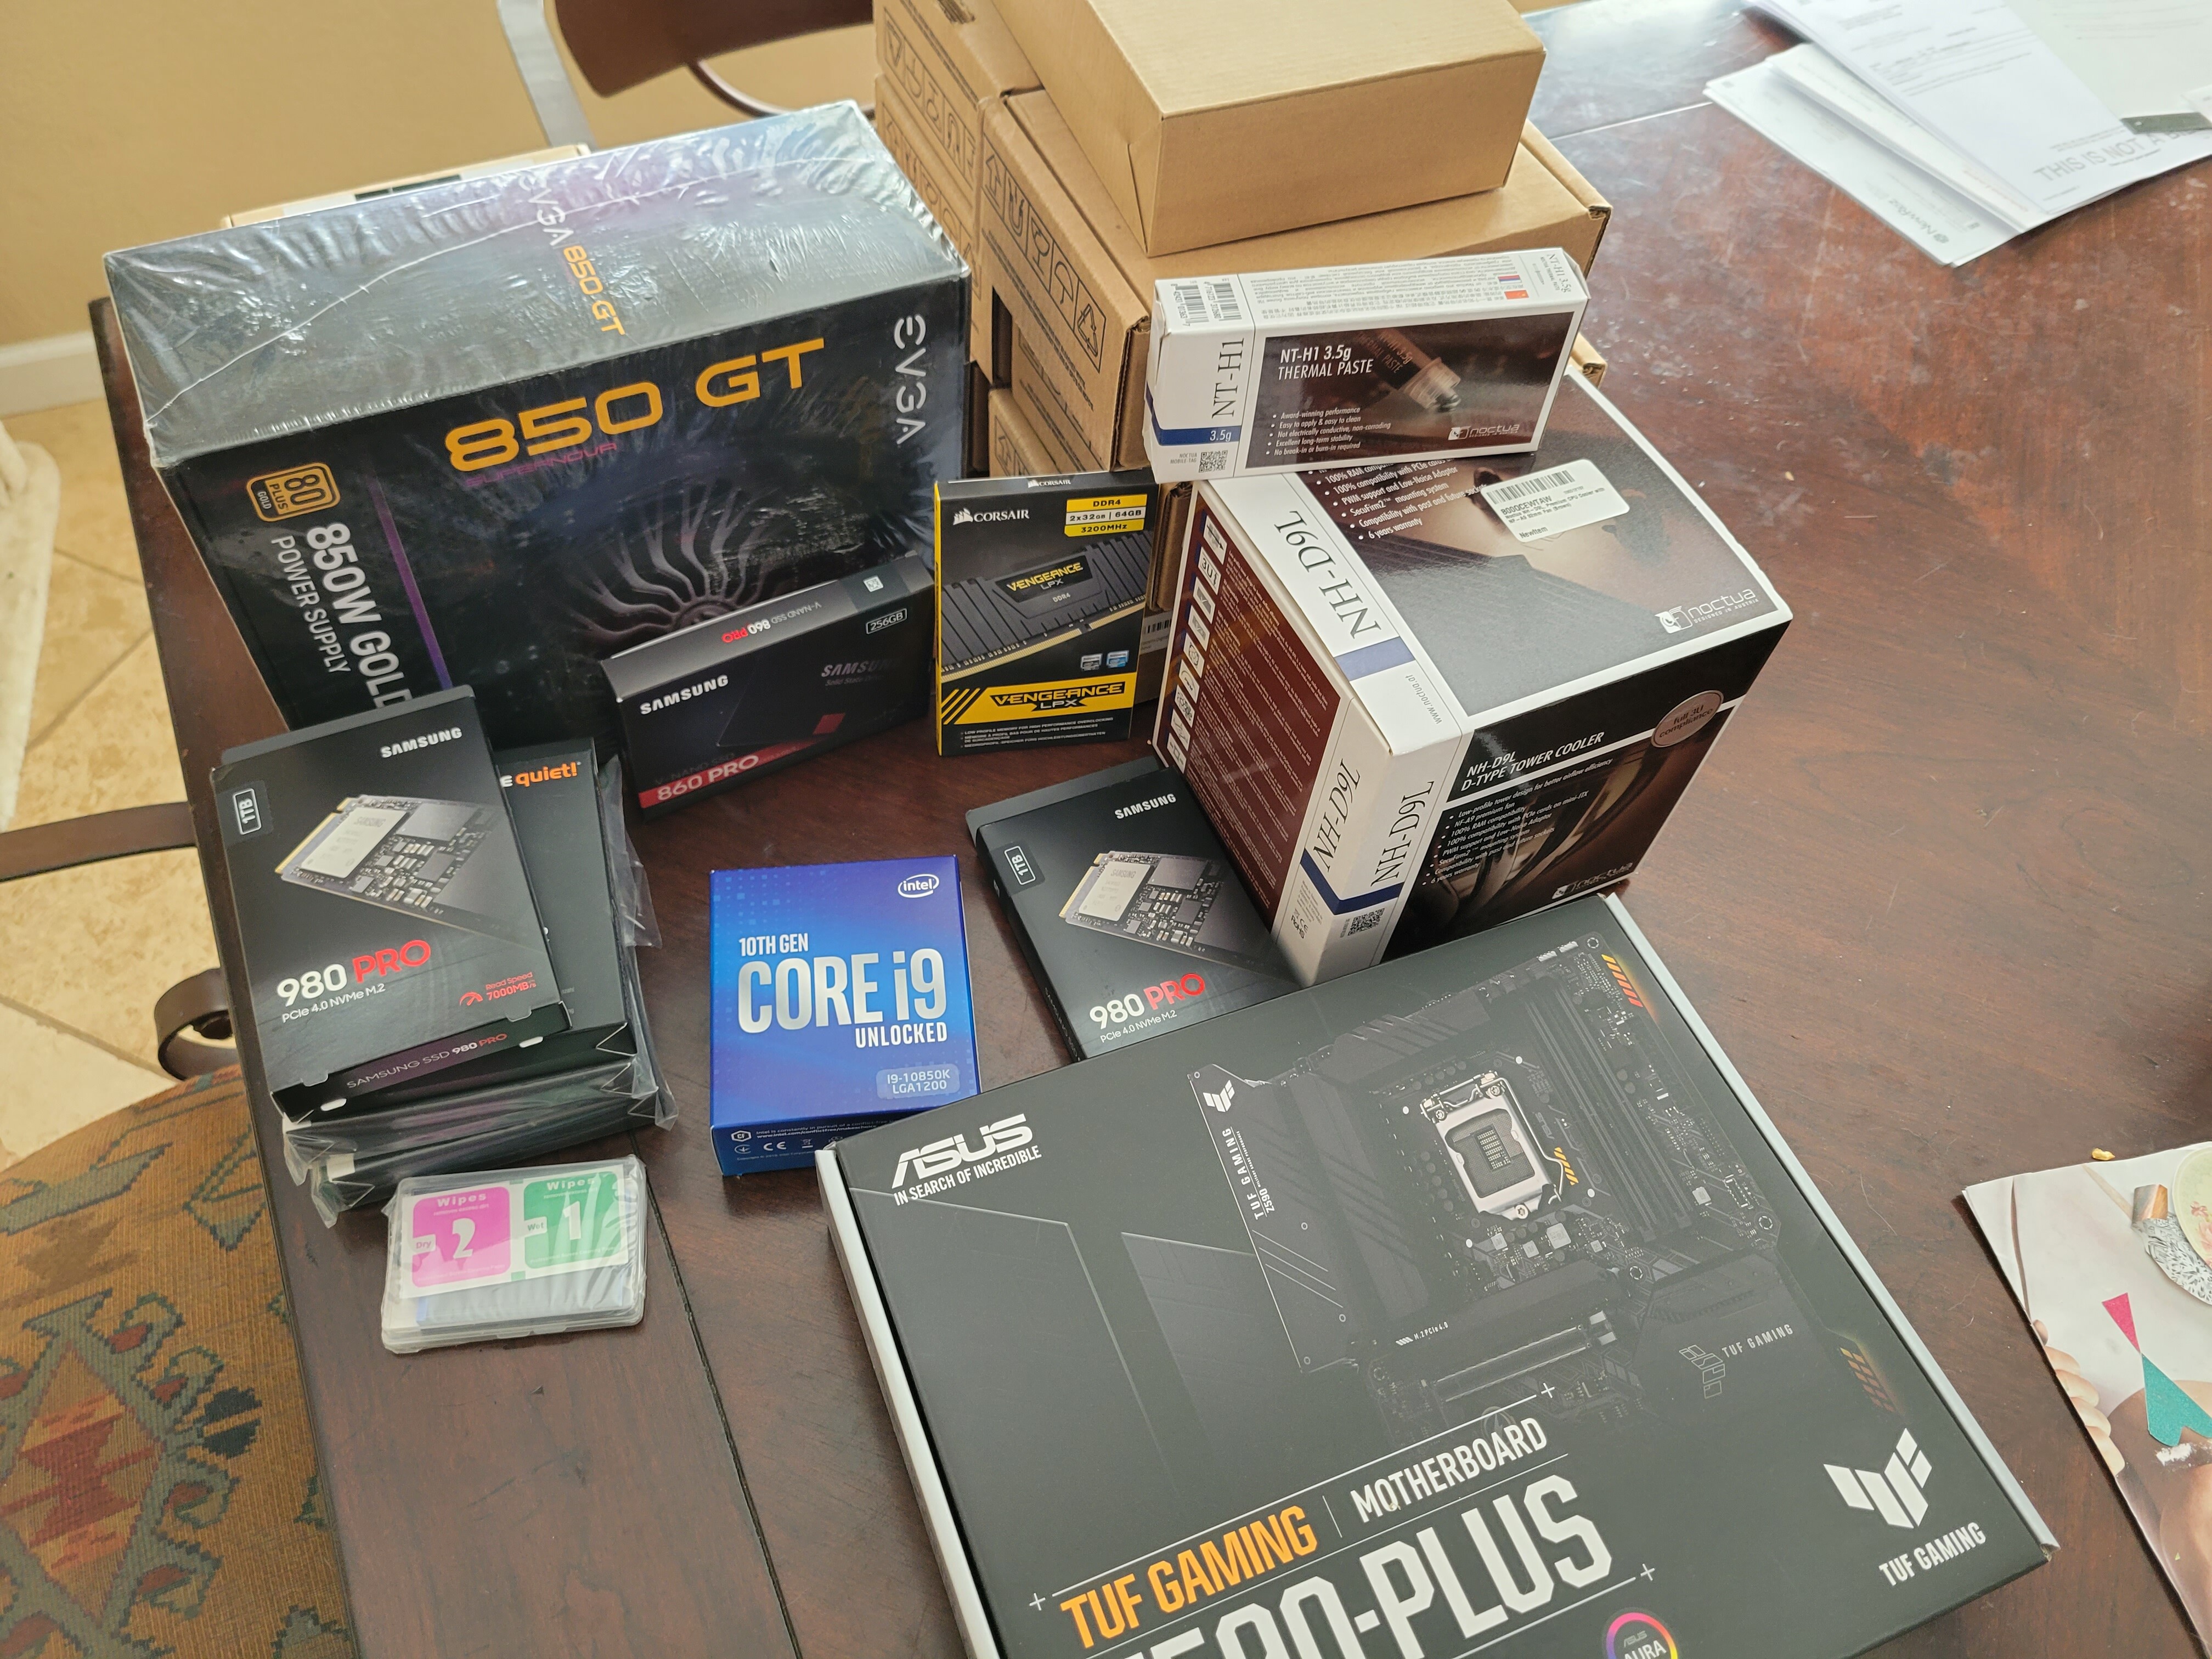
DUDE sooo close!! Always exciting when goodies arrive!
If your motherboard is DOA, outside the case has a distinct advantage!! ![]()
@rkalla Funny i found this thread as i am bulding almost the same config (re-building what was a gaming rig). Lets see if we can exchange experiences with staggered-plotting settings etc down the road.
My setup is as follows:
- Intel Core i9-10850K
- ASUS TUF GAMING B560M-PLUS
- Seasonic Focus GX 750, 750W PSU GOLD
- Cooler Master Hyper 212 RGB Black Edt
- HyperX Fury 64GB DDR4 CL16 DIMM 3200Mhz (4x16)
- 1x Kingston 120GB SATA (boot)
- 2x Patriot Viper VPN100 2TB M.2 SSD (striped as temp)
- 1x Corsair Force Series MP600 1TB M.2 SSD (staging)
- Adaptec ASR-71605 1GB Cache 16-Port 6Gbps (HBA card)
- 4x CableDeconn SFF-8643 to 4x SATA cable
- 10x SEAGATE EXPANSION DESKTOP USB 3.0 14TB (plot)
1 Like
Have you considered a more substantial cooler? The sustained CPU usage may be a bit much for the hyper 212.
DUDE sooo close!! Always exciting when goodies arrive!
So true - I still get excited about this even as an adult. I used to be insufferable when I was much younger - checking mailbox, checking front door, hearing truck sound and running to front window to see if it was UPS, etc. etc.
If your motherboard is DOA, outside the case has a distinct advantage!!
OH! Ok now you’re talking my language. Very true.
I do also like the idea that I could technically get the machine ‘setup’ tonight and then just reassemble it into the case and boot it… hmmmm @Blueoxx you might be on to something here…
2 Likes
Oh damn you weren’t kidding, we are close-ish!
Adaptec ASR-71605 1GB Cache 16-Port 6Gbps (HBA card)
How do you configure/connect this? I see the army of external HD’s you picked up, so not sure what role the RAID card plays in this?
1x Corsair Force Series MP600 1TB M.2 SSD (staging)
Wait, what is ‘staging’? Goddamnit, do I need another hard drive?
I thought you just plotted on super fast ‘temp’ drives and then they moved off to storage… OR is this someplace you move them to ASAP to free up the plotting space and then move them to the USB 3.0 drives? You are just tryign to optimize for ‘fastest time to next plot’ maybe?
4x CableDeconn SFF-8643 to 4x SATA cable
Which link on amazon specifically? I’ve seen these cables mentioned a few times and will pick some up - just noticed there a lot of different kinds/pairs of them.
10x SEAGATE EXPANSION DESKTOP USB 3.0 14TB (plot)
Did you go all external purely from a cost perspective? If so, I get it. If not, then I don’t get it and I need to be informed ![]()
Yes, continuous TRIM is generally better for most drives (that can handle it well) as it provides regular information to the drive to perform garbage collection etc.
However it can cause performance issues (queue blocking) when it is done synchronously (like with ext4). Best to use XFS TRIM which is asynchronous which should perform better, or Btrfs (with mount option discard=async)
1 Like
I’ve never tried to purposefully signal a drive to TRIM before - is it just a command you can stick in a cron job that runs every minute or boot params?
Scheduled TRIM (e.g. once a day or week) is usually enabled by default in most distros. To enable continuous TRIM, add -o discard when mounting manually or add discard as a mount option in /etc/fstab .
Or you can run a manual TRIM with sudo fstrim -v /mountpoint
Source:
4 Likes
You rock man - thanks for putting that here for easy reference.
The Adaptec card is basically an easy way to connect the Seagate discs after i have chucked them out of their boxes, at least this was my inital plan. Yes i got they purely from a cost perspective (was 269$ on sale in my country).
I use a staging disk between the 2x2TB M2 temp discs and the final storage (HDD), this is so that two (or more) plotters do not try to write to the same HDD at the same time. It will cause a huge bottleneck when running in paraell. I then have a simple bat file checking for new *plot files on the staging disc every 30s and then move them to the HDD’s.
CABLEDECONN Internal HD Mini SAS (SFF-8643 Host) to 4X SATA (Target) Hard Drive Cable (100CM)
OHHH you are going to shuck them - got it - thank you for clarifying. Definitely makes sense.
Also understand the staging drive now as well - I’m definitely at risk of hitting that bottleneck with my setup because I’m going straight from fast SSD to slow-spindle.
(thx for link! ordered!)
Just occurred to me that I forgot additional SATA cables - thought for some reason more would come with mobo (2x).
Just overnighted 3x of these:
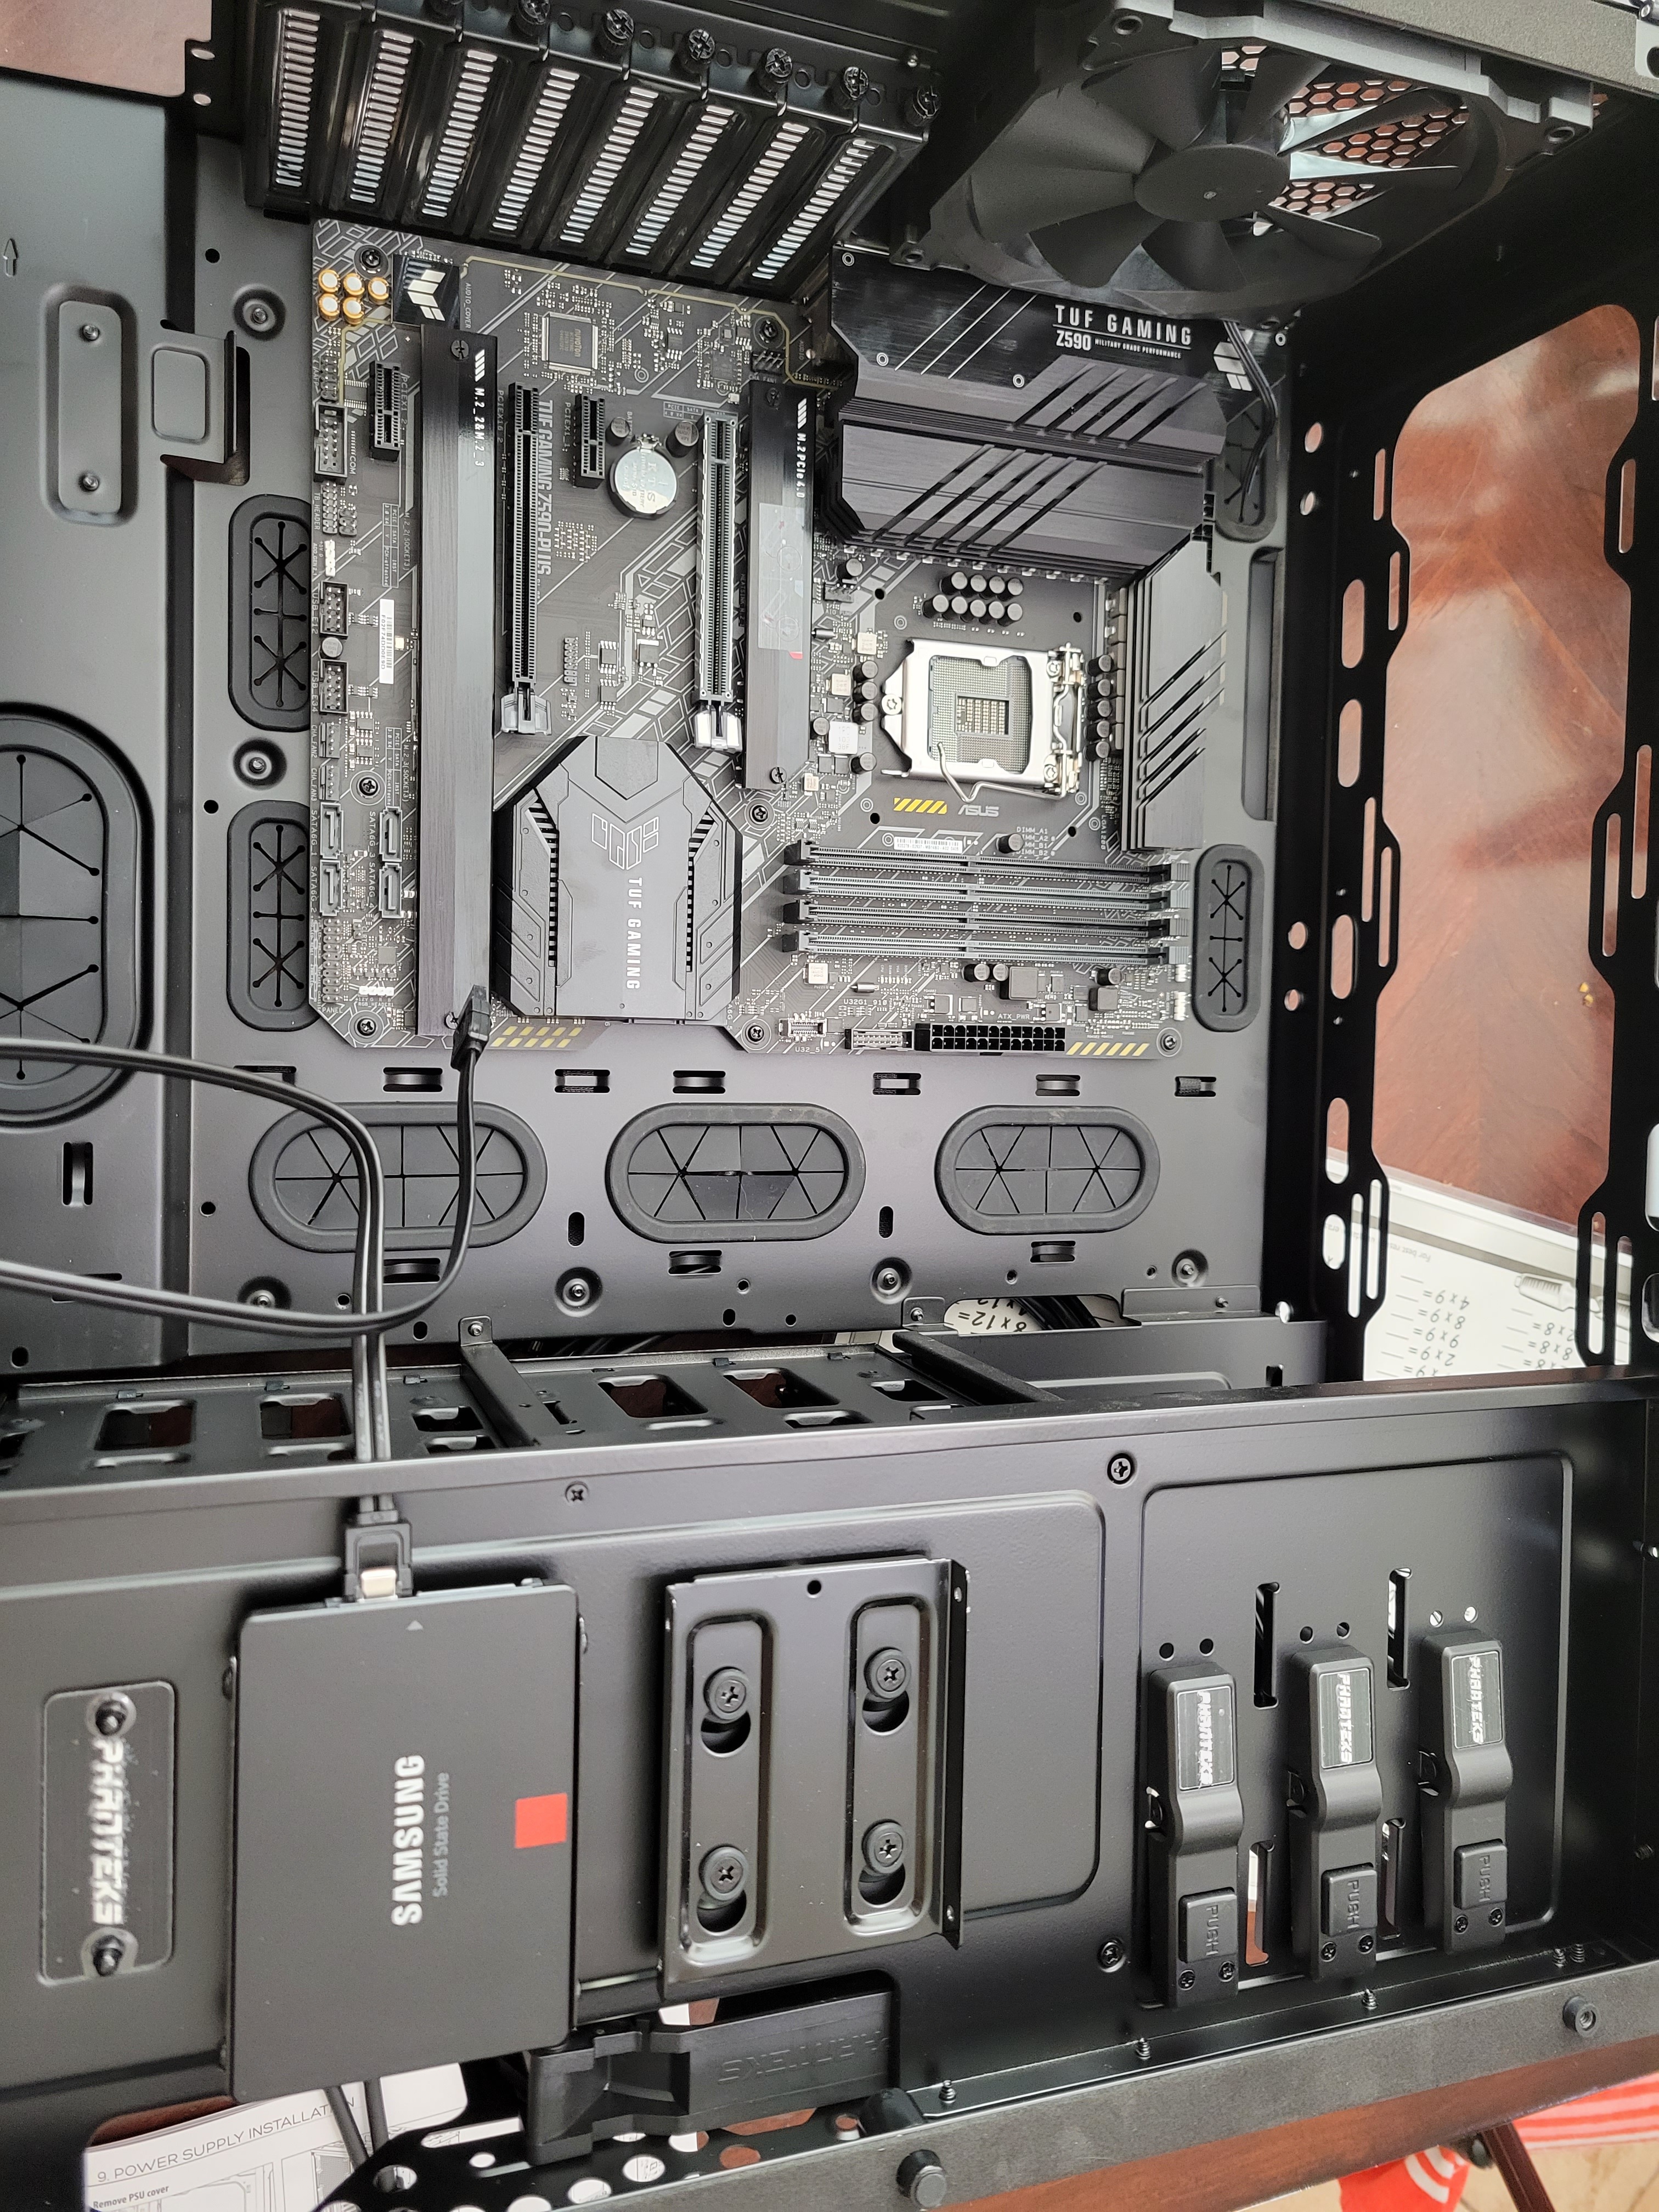
Just this moment dawning on me that to make my boot drive a SATA SSD (Samsung 860 Pro) - that leaves me 5x SATA ports for my 6 SATA farming storage drives…
I didn’t realize this board has 3x M.2 connectors on it - the long plate along the bottom I have 2x Samsung 980 Pros in (1TB) - they do some bandwidth sharing with two of the SATA ports which I don’t think will be much of a problem or at least I’m not concerning myself with it right now.
That leaves the pcie 4.0 m.2 slot up by the CPU completely unoccupied. It probably would have been smarter of me to do another smaller m.2 drive there as the boot drive.
I may still do that because this will bug the hell out of me having the build unbalanced… Hmmmm
2 Likes
Yeah man! All the little details add up for sure! I’m a tad spoiled here with two big computer stores within 20min of me!!
UPDATE
Per my finding here - I’m returning the 860 SATA drive and ordered an 860 M.2 drive to put into the 3rd M.2 slot on the board. That won’t get here until Sunday unfortunately.
The rest of the build came together fairly well, here are some notes:
- The case (Phanteks Enthoo Pro TG PH-ES614PTG_BK) is legit - absolutely worth $99 that I paid for it - I probably would have been happy with it up to $150. There are a lot of supplementary connections on it for liquid cooling setups and LEDs that I just ignored - but there are two SATA power connectors hooked up to hubs on the case that… I couldn’t figure out. Docs say nothing about them and everything works (front panels, inputs, outputs, case fans that came preinstalled, etc.) - so that’s the only head scratcher. Great routing options and big and beefy.
- Motherboard (ASUS TUF GAMING Z590-PLUS) is gorgeous and well built - I would buy it again 10x out of 10.
- PSU (EVGA SuperNOVA 850 GT) is wonderful @vandy you were right here 100%. This is my GOTO now. Tons of connectivity and power for bigger setups. I used 4 of the provided cables (mobo, 12v mobo, 2x SATA) - everything else is blanked.
- CPU Cooler (Noctua NH-D9L) is a gorgeous piece of engineering - I have used it on a few builds and will continue to do so going forward unless I can’t.
CPU, Samsung drives and the rest was all wonderful as it typically is.
One ODDITY I had never experienced before… at first boot, the machine posted and power cycled 6x before finally sending video output to the monitor so I could see what was going on… I was MOMENTS away from powering it down and starting to pull components to figure out what was going on… maybe the mobo was just calibrating?
After all those “break in” reboots - and then 2 or 3 after setting up the RAID 0 array… it’s stable as can be - I wasn’t catching any details on the screen (no video signal) so I imagine it was doing something impressive.
re: COOLING - I ended up adding 3x 120mm 2000 RPM fans to the case which already had 2x mounted in it from the manufacturer - at idle the machine is ignorably quiet… the fans all come up on the RPM monitor and show ~500 rpm… so with all those spun up to 4x speed and the hard drives all clacking away I imagine it might get a bit much to try and sleep next to. I’ll keep you all posted.
FOR REFERENCE (because I can’t edit the first post anymore), here’s the build list for anyone interested:
- Intel Core i9-10850K
- Noctua NH-D9L (CPU Cooler)
- ASUS TUF GAMING Z590-PLUS
- EVGA SuperNOVA 850 GT
- Phanteks Enthoo Pro TG PH-ES614PTG_BK
- Corsair Vengeance LPX 64GB (2x 32GB) DDR4 3200
- (BOOT) 1x SAMSUNG 860 EVO SSD 250GB M.2
- (PLOTTING) 2x Samsung 980 Pro 1TB M.2 (RAID-0)
- (STORAGE) 6x Western Digital 14TB Ultrastar DC HC530 SATA
One addition I would consider (but want to watch the actual real-world performance for a while) is based on @spinx comment here - potentially adding a 1TB-or-so SSD for the PLOTTING drives to write to as temporary holding space that a script then moves to STORAGE.
6 Likes
@Quindor @vandy @spinx I filled all my drive bays and all my mobo SATA ports with this build (6x SATA) - what are your recommendations on how to double or quadruple the storage on this build?
Ahh let the Chia addiction begin!! ![]()
You’ll need to start researching farming from here on out and you’ll need to figure out ways to go external with your storage growth requirements. My suggestion is read this: (and just scroll straight to the bottom ![]() ) Chia Cryptocurrency Farming Guide - Chia Decentral
) Chia Cryptocurrency Farming Guide - Chia Decentral
Side tangent to this whole adventure for you @rkalla you seem very detailed and thoughtful in your writing — have you considered starting a blog to document your chia experience??
1 Like